In this article, I look deeper into affordable object storage by exploring the configuration of Synology’s CloudSync app on a Synology NAS for data backup to the Synology C2 Object Storage service. To follow along, you can easily sign up for a 15GB trial account.
Setting Up a C2 Object Storage Bucket#
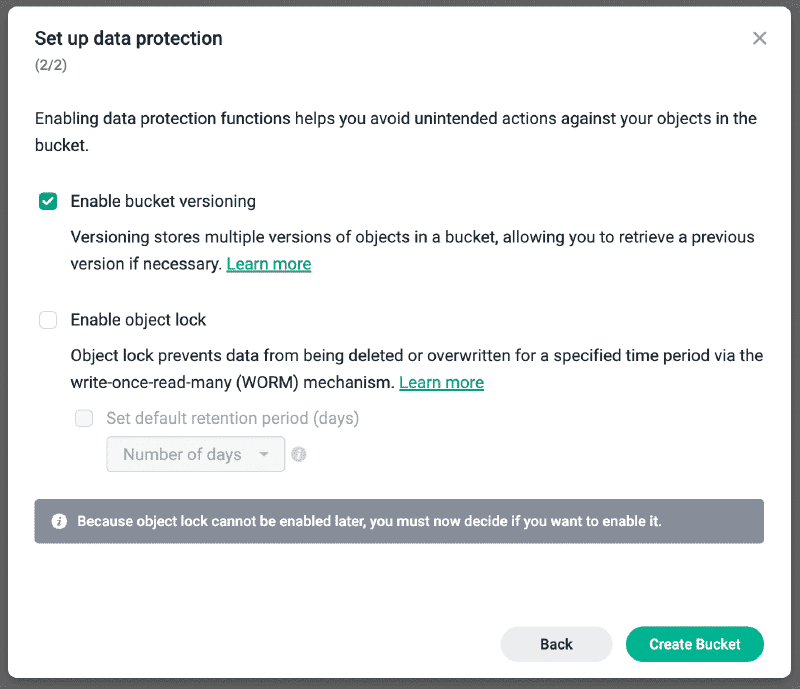
Let’s kick off by establishing the Object Storage bucket. We’ll log in to the C2 website, where the URL for the APAC region is https://object.tw.c2.synology.com/bucket. The user interface is straightforward. For first-time users like me, clicking the Create Bucket button initiates the process.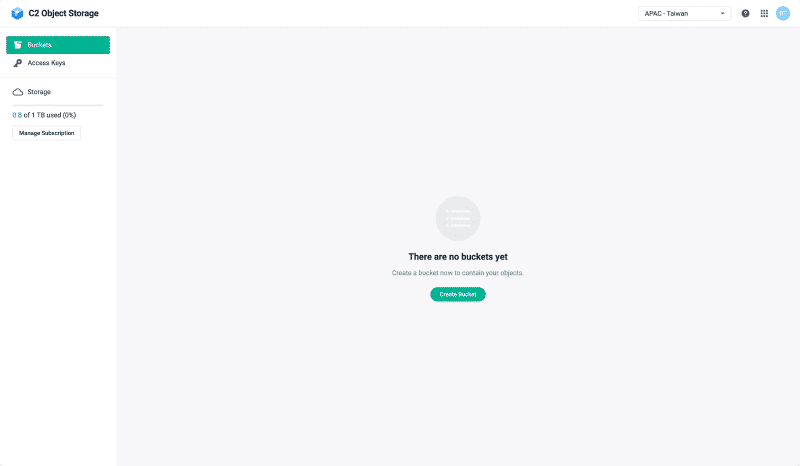
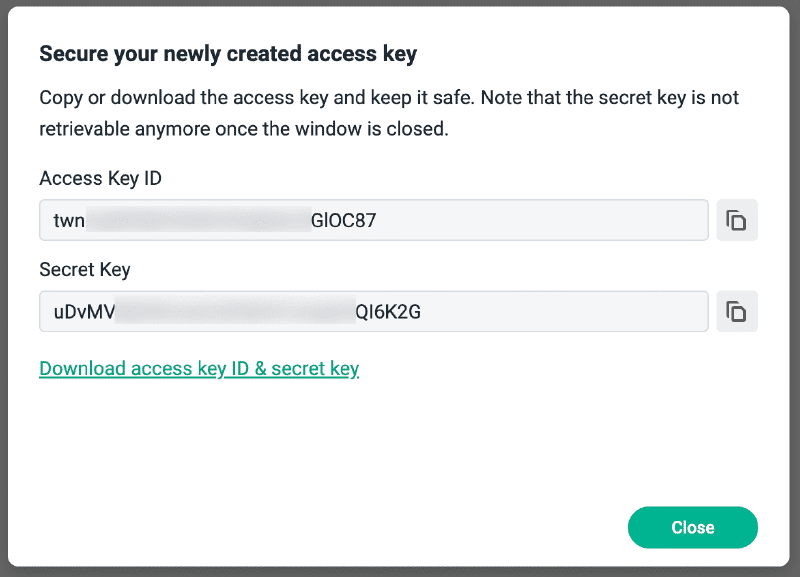
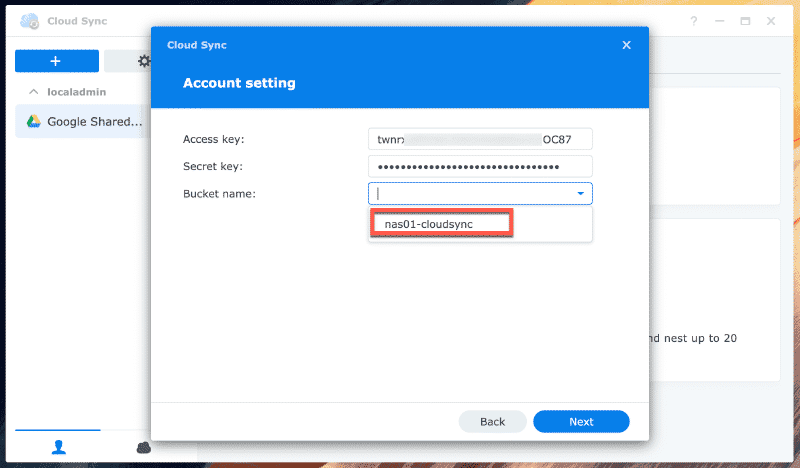
NAS01-CloudSync. Simultaneously, I’ll generate an access key, crucial for configuring Synology CloudSync.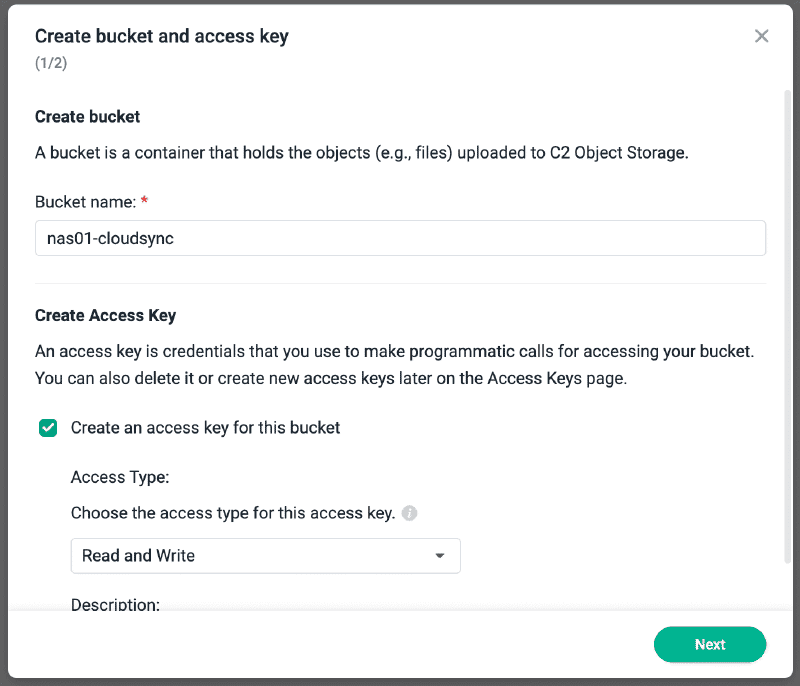
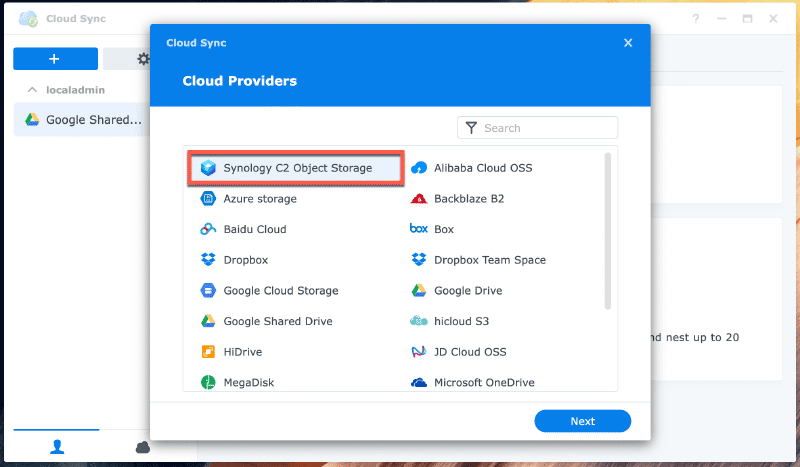
Setting Up CloudSync#
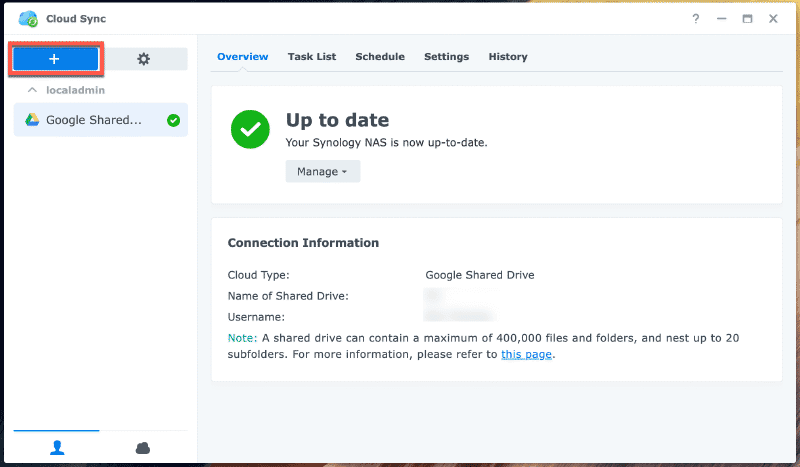
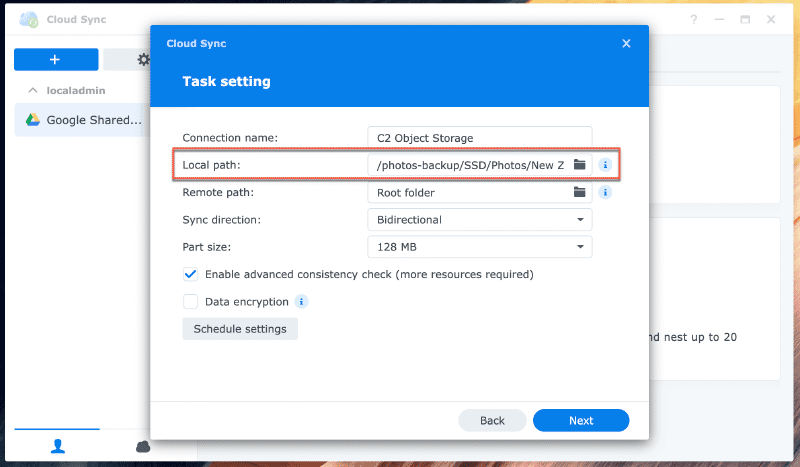
To initiate the process, ensure the CloudSync app is installed on your NAS via the Package Center. Once installed, open CloudSync and proceed to add a new connection to a Cloud Provider.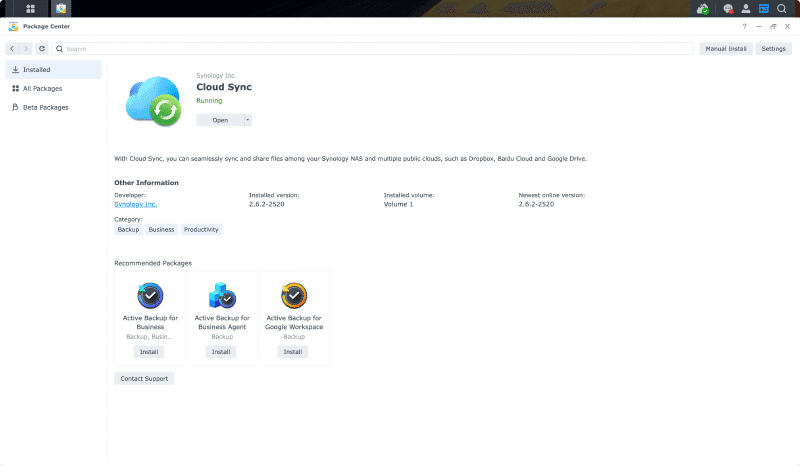

Retrieving Previous Versions#
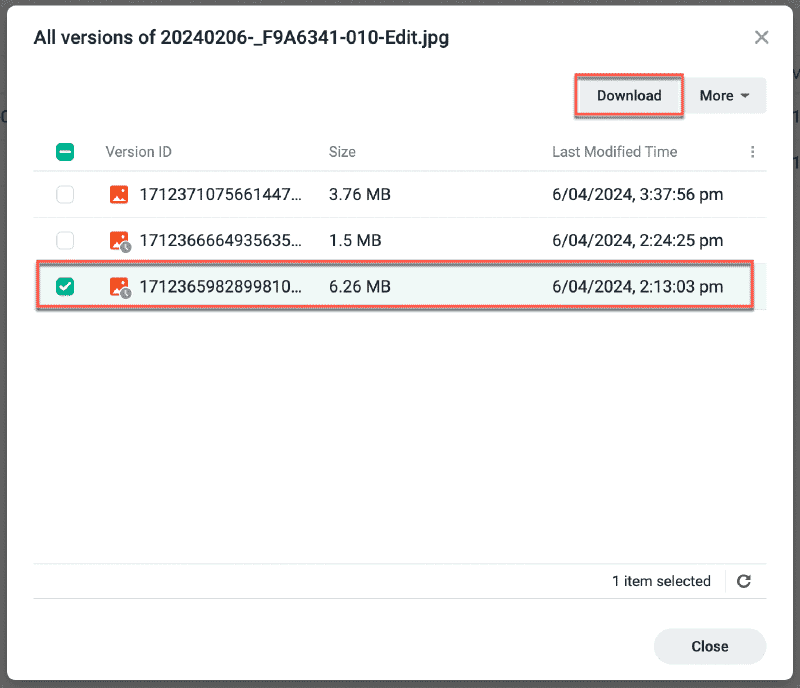
Now that my photos are safely stored in C2 Object Storage, I encountered a common dilemma: accidentally overwriting the original copy of a photo during editing. Fortunately, since we enabled bucket versioning upon creation, let’s explore how to access and recover those previous versions.
First, navigate back to the C2 Object Storage web interface, and locate your file within the designated bucket and folder. For instance, mine is in the temp folder at the root of the bucket.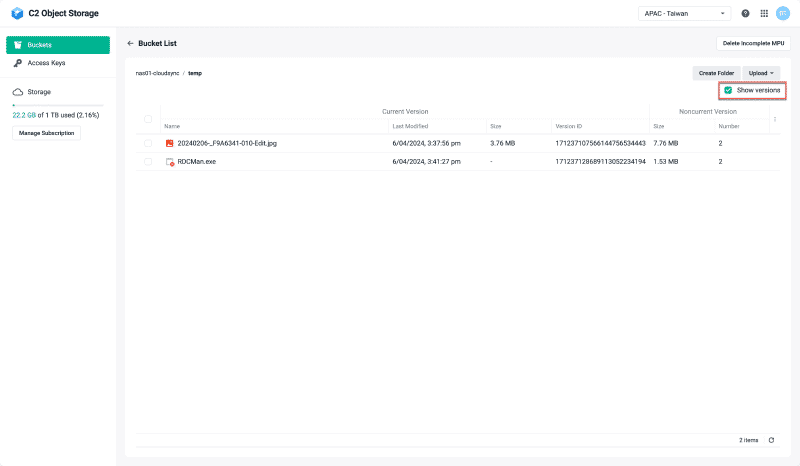
Show versions option, you can easily identify files with previous versions, their respective space consumption, and the number of stored versions. Hover over the file and access the menu to view all available versions.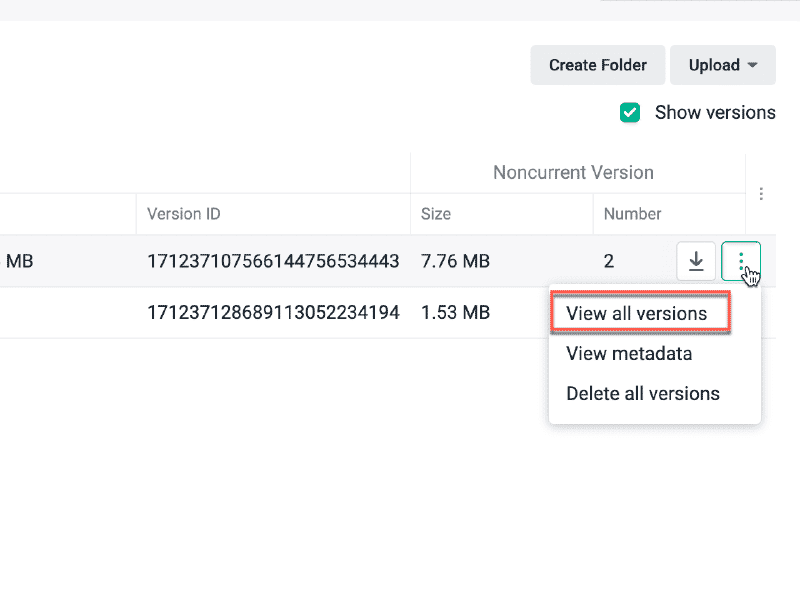
Exploring C2 Object Storage with Cyberduck#
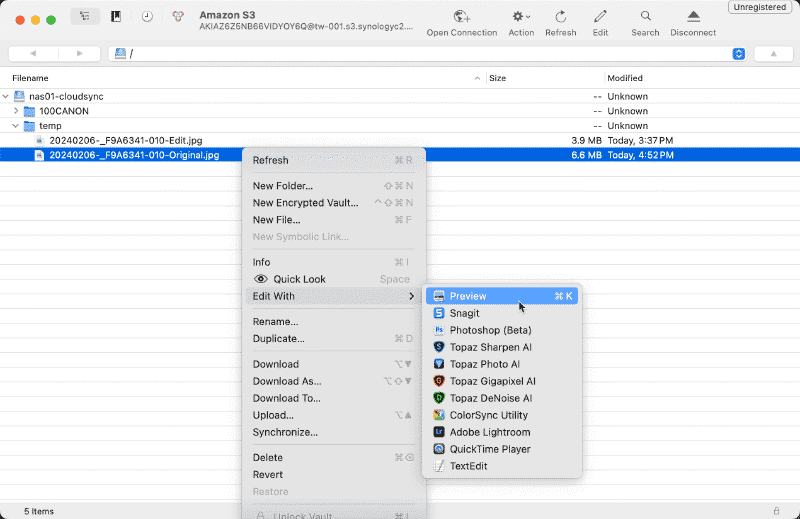
An added benefit of utilizing CloudSync with Object Storage is the ability to access your bucket data using third-party applications, even when unable to access the original NAS. To demonstrate this capability, let’s use Cyberduck to connect to the bucket and view the previously restored photo.
In Cyberduck, initiate a new connection and select Amazon S3 as the connection type.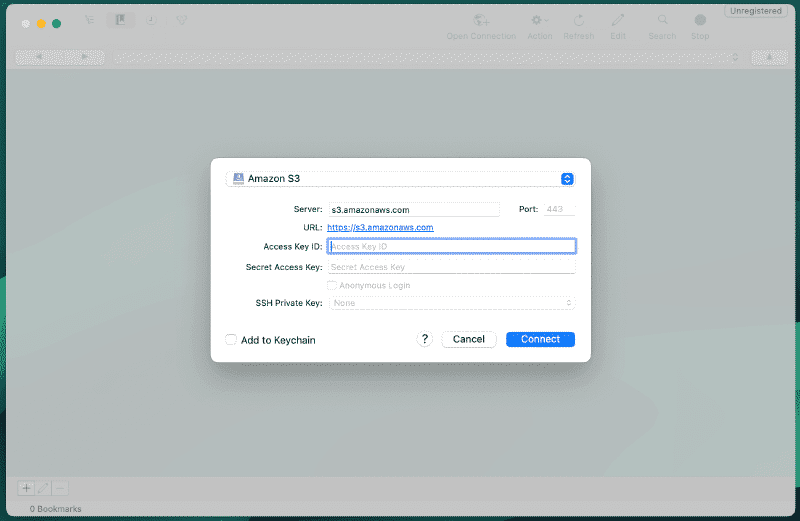
Access Key ID and Secret Key obtained from the CloudSync app connection. However, since we’re using C2 Object Storage instead of Amazon S3 Storage, adjust the Server address accordingly. Copy the endpoint details from the C2 Object Storage UI on the buckets screen.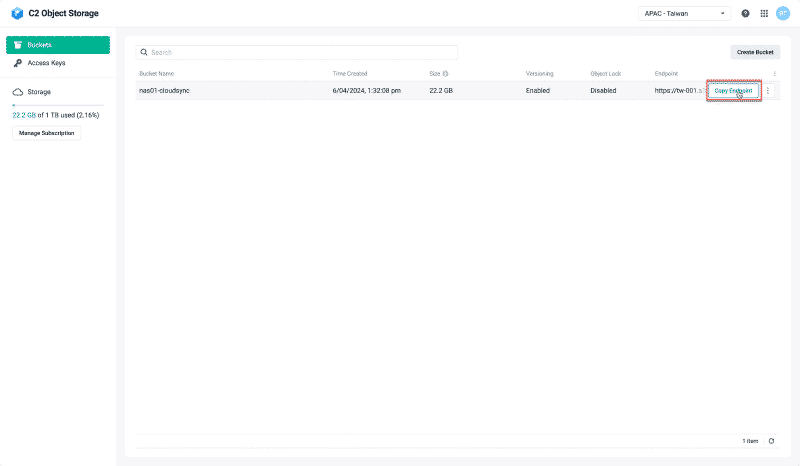
https://. To resolve this, paste the endpoint into a text editor and remove the https:// prefix before inputting it into Cyberduck.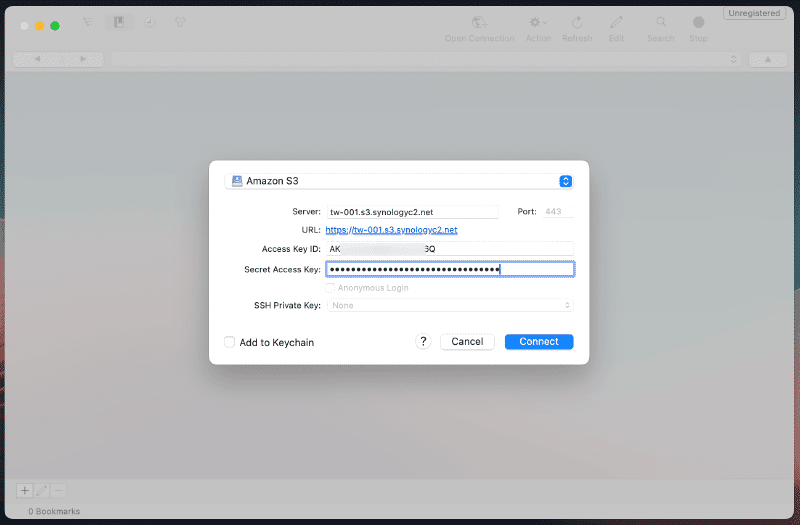
Conclusion: Wrapping Up#
I trust that this journey through Synology CloudSync and C2 Object Storage proves beneficial for others seeking to fortify their data protection measures. It presents a straightforward method to initiate the transfer of essential data offsite, shielding it from potential failures or corruption.