
One of the awesome features of Azure VMs has been that they have their own identity in Azure AD, much like traditional servers on-prem have had computer accounts in Active Directory, and these identities can be used to authenticate against other Azure services such as Azure KeyVault.
Thanks to this native ability, it’s been possible to securely store objects such as secrets for User accounts, API Keys and things like Certificates in KeyVault and access them from other Azure Resources without having to create and store credentials those services. However, this feature has only been available for native Azure resources until now.
For the rest of this post, I will assume that you’ve already deployed an Azure Arc agent to a Windows machine. However, if this is not the case, I recommend heading over to the docs.microsoft.com page for more details on this.
Accessing the Azure Arc enabled servers agent#
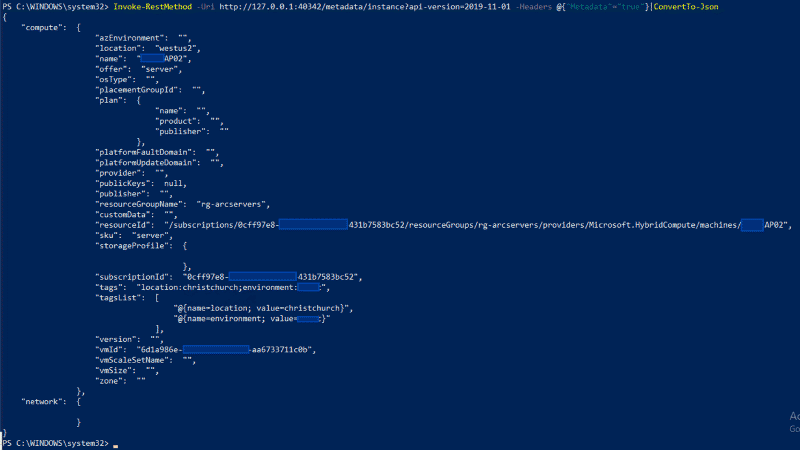
Just like with Azure VMs, when Azure Arc is deployed to a traditional server, the agent exposes an instance of the Azure Instance Metadata Service.
However, there is a slight difference in that the Azure Arc agent exposes this on http://127.0.0.1:40342, rather than http://169.254.169.254 like the native Azure agent. Apart from that, as you can see it can be queried just like normal.
This endpoint address is stored in an environment variable called IDMS_ENDPOINT for easy access though.
Finding the Token#
When it comes to getting a token, the process is similar to native Azure VMs, however, there are some slight differences.
With Azure VMs, you can just query the /metadata/identity/oauth2/token endpoint for the agent, and get a token back straight away. But with Azure Arc, you need to prove you have rights to access the token but responding to a challenge.
The process is fairly straight forward:
- Send an HTTP request to the Azure Arc Endpoint -
http://localhost:40342/metadata/identity/oauth2/tokenor the environment variableIDENTITY_ENDPOINT - Capture the response
- Read the contents of the
WWW-Authenticateheader in the response, to find the path to the local challenge token - Get the contents of that local file
- Send another HTTP Request to the Azure Arc Endpoint, but this time including the contents of that local file as the Authorization header.
In Powershell, the steps would look like this if we wanted a token for querying Azure resources:
# Get Arc API Token
try {
    Invoke-WebRequest -UseBasicParsing -Uri "http://localhost:40342/metadata/identity/oauth2/token?api-version=2019-11-01&resource=https%3A%2F%2Fmanagement.azure.com%2F" -Headers @{ Metadata = "true" } -Verbose:0
}
catch {
    $response = $_.Exception.Response
}

# Extract the path to the challenge token
$tokenpath = $response.Headers["WWW-Authenticate"].TrimStart("Basic realm=")

# Show Path to Challenge Token
$tokenpath

# Read the token
$token = Get-Content $tokenpath

# Acquire Access Token
$AzureArcToken = Invoke-RestMethod -UseBasicParsing -Uri "http://localhost:40342/metadata/identity/oauth2/token?api-version=2019-11-01&resource=https%3A%2F%2Fmanagement.azure.com%2F" -Headers @{ Metadata = "true"; Authorization = "Basic $token" }

# Show returned token
$AzureArcToken
Now let’s see it in action
Assigning access to an Azure KeyVault#
Now that we’ve been able to access a token, we’re only halfway there. We now need to assign the Azure Arc identity access to the KeyVault itself.
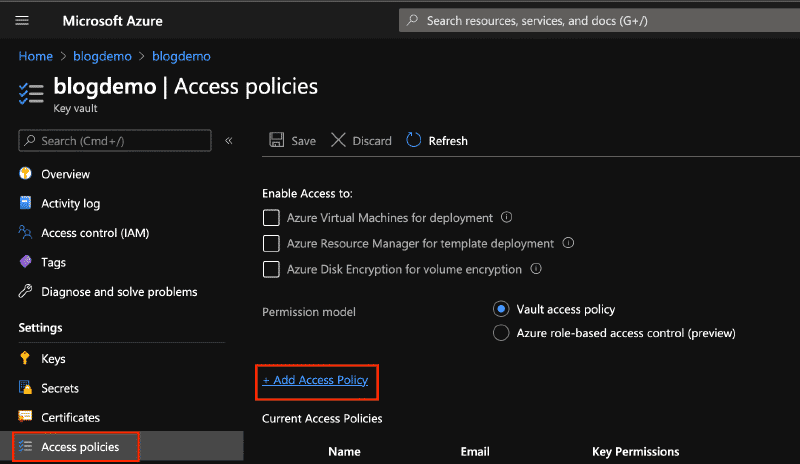
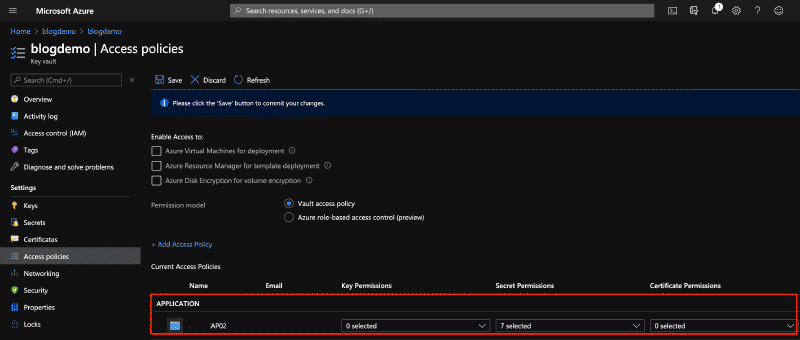
Through the Azure Portal, navigate to the KeyVault instance you want to grant access to, go to Access Policies and click Add Access Policy
Select the permissions you want to grant, in this case, Secret Management, and then click None Selected beside the Select principal to add the machine.
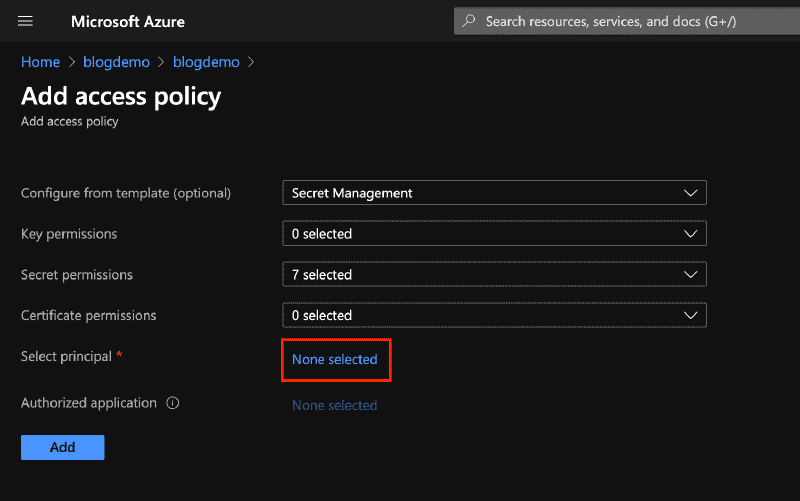
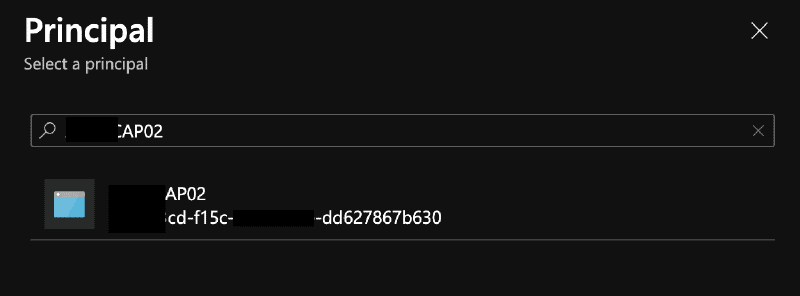
Use the search function to locate your Azure Arc identity, select it and any others you want to add and click Select
Click the Add Button back on the Add Access Policy screen, and you’ll see your new policy has been successfully created.
For steps on how to perform this action via Azure Powershell, see the Microsoft Docs page.
Accessing a KeyVault#
Normally at this point, you would be able to use the Connect-AzAccount -Identity command in your Azure VM to authenticate with your managed service identity before running the normal Get-AzKeyVaultSecret commands, however, this isn’t currently compatible with the Azure Arc Endpoint.
So instead we’re limited to making native API calls to the KeyVault service instead.
Luckily Microsoft documents all their APIs pretty well on docs.microsoft.com, so this isn’t too hard to work out.
Before we run through a few examples of accessing the Azure KeyVault APIs, here is a quick function to make retrieving the Azure Arc Identity token a little easier.
Function Get-AzureArcToken {
    [cmdletbinding()]
    param(
        [string]$ResourceURI
    )
    # Build up URL
    $SafeString = [System.Net.WebUtility]::URLEncode($ResourceURI)
    $URI = "http://localhost:40342/metadata/identity/oauth2/token?api-version=2019-11-01&resource={0}" -f $SafeString
    # Get Arc API Token
    try {
        Invoke-WebRequest -UseBasicParsing -Uri $uri -Headers @{ Metadata = "true" } -Verbose:0
    }
    catch {
        $script:response = $_.Exception.Response
    }

    # Extract the path to the challenge token
    $tokenpath = $script:response.Headers["WWW-Authenticate"].TrimStart("Basic realm=")

    # Read the token
    $token = Get-Content $tokenpath

    # Acquire and return Access Token
    Invoke-RestMethod -UseBasicParsing -Uri $uri -Headers @{ Metadata = "true"; Authorization = "Basic $token" }
}
List Secrets in an Azure KeyVault#
A common scenario will be finding out what secrets are currently available in a KeyVault instance.
To do this, we need to get a Token for interacting with the KeyVault API, and then make a call to the /Secrets endpoint.
This endpoint is fairly basic, all we can specify is the API version and the maximum number of results we want to be returned.
In this example, we will be querying a KeyVault instance called blogdemo and so the URL for our query will be https://blogdemo.vault.azure.net.
# Get an Azure KeyVault Access Token with new Function
$AccessToken = Get-AzureArcToken -ResourceURI 'https://vault.azure.net'
# Setup Query Attributes
$Query = @{
    Uri     = "https://blogdemo.vault.azure.net/secrets?api-version=7.1"
    Method  = "Get"
    Headers = @{
        Authorization = "Bearer $($AccessToken.access_token)"
    }
}
# Retrieve Secrets
Invoke-RestMethod @Query | Select-Object -ExpandProperty Value | fl *
Get Secret Content#
Now that we know there are secrets stored in the vault, we probably want to view the contents of one of them.
The endpoint this time is the value of the ID field in the output of our previous query. But if you know the name of the
secret you want to query, you can work out the URL by adding it to the end of the path for the previous query. In our case,
this means that to query secret1 the URL is https://blogdemo.vault.azure.net/secrets/secret1.
# Get an Azure KeyVault Access Token with new Function
$AccessToken = Get-AzureArcToken -ResourceURI 'https://vault.azure.net'
# Setup Query Attributes
$Query = @{
    # URI of the specific secret we want
    Uri     = "https://blogdemo.vault.azure.net/secrets/secret1?api-version=7.1"
    Method  = "Get"
    Headers = @{
        Authorization = "Bearer $($AccessToken.access_token)"
    }
}
# Retrieve Secrets
Invoke-RestMethod @Query | Select-Object -ExpandProperty Value | fl *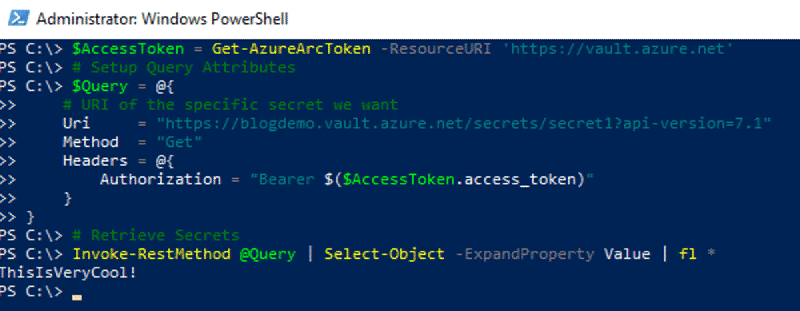
Create new Secret#
Viewing existing secrets is good, but being able to create new secrets is just as important.
Much like the previous API calls we’ve made, we will be using the /secrets/{secretname} endpoint, only this time
it will be a PUT request rather than a GET request.
This is because we need to provide information on the secret we want to store, at a minimum the secret itself.
There are several useful additional details you can provide including but not limited to:
- Content Type
- Expiry Date
- Azure Resource Tags
These are all documented in RestAPI reference page.
Here we’re creating a new secret call DemoSecret, with the secret value Anything1sPossible!,
and expiry date 30 days in the future and some Azure tags.
# New Secret Name
$SecretName = "DemoSecret"

# Get an Azure KeyVault Access Token with new Function
$AccessToken = Get-AzureArcToken -ResourceURI 'https://vault.azure.net'
# Setup Secret Attributes
$SecretAttributes = @{
    value       = "Anything1sPossible!"
    contentType = "plaintext"
    attributes  = @{
        # Expiry Date is in 30 days time
        exp = [datetimeoffset]::UtcNow.AddDays(30).ToUnixTimeSeconds()
    }
    tags        = @{
        use  = "powershell"
        demo = "yes"
    }
}

# Setup Web Request
$WebRequest = @{
    Uri         = "https://blogdemo.vault.azure.net/secrets/$($SecretName)?api-version=7.1"
    Method      = "Put"
    ContentType = "application/json"
    Headers     = @{
        Authorization = "Bearer $($AccessToken.access_token)"
    }
    Body        = ($SecretAttributes | ConvertTo-Json)
}

# Create Secret
Invoke-RestMethod @WebRequest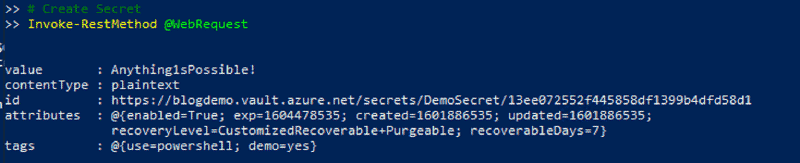
Delegating access to Azure Arc tokens#
Now that we’ve looked at how powerful the Azure Arc tokens can be, you might be wondering about delegating or securing access to them.
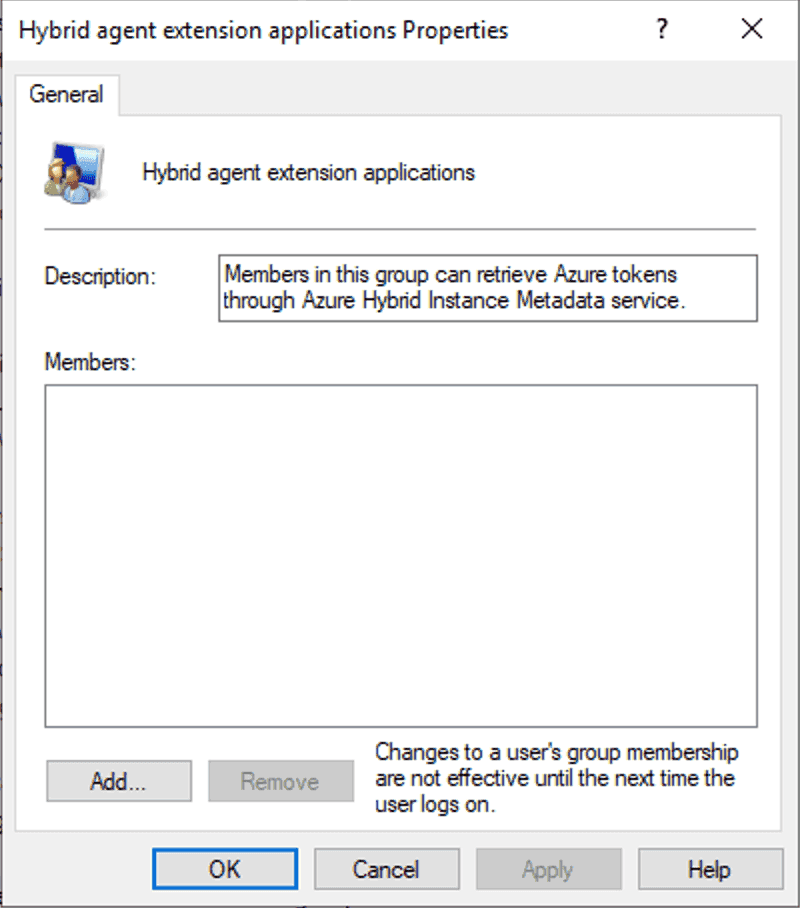
By default, Users with Local Admin rights have access, however, when you install the Azure Arc agent on a machine, it creates a new local security group called Hybrid agent extension applications.
This security group allows access to the folder where the Arc challenge tokens are generated for authenticating against the IDMS Endpoint.
Wrapping up#
As you can see, Azure Arc is lighting up more and more hybrid scenarios, and enabling you to operate in a cloud mentality on-prem, just like you do in Azure.
You can now access Azure Resources with Managed Service Identity access tokens, such as Azure KeyVault, rather than creating SPNs and trying to securely store and rotate their credentials.
In future, you could even look to use this to rotate and store the local administrator account credentials in Azure KeyVault for on-prem machines, much like LAPS does today, but without Active Directory. This would bring the security enhancements of LAPS to non-domain joined machines or sensitive workloads like backup servers.
As always, feel free to reach out to me here, or on Twitter (@NZ_BenThomas) and let me know what you thought of this post, or any follow-up questions you might have about it!